Ever looked at that bag of granular fertilizer and wondered if you could turn it into a liquid solution? You’re not alone.
Here’s the deal: mixing granular fertilizer into liquid is totally doable. And it can save you money while giving your plants a faster nutrient boost than traditional dry applications.
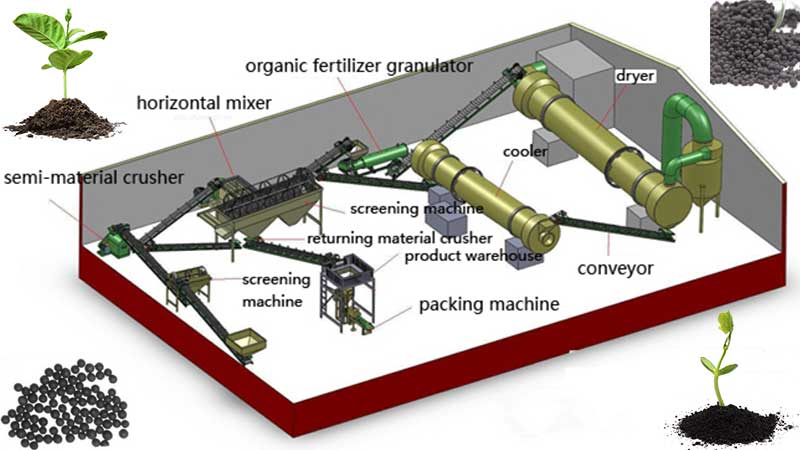
I’ve been converting granular fertilizers into liquid solutions for years. And in this guide, as a professional fertilizer mixer machine manufacturer, I’ll show you exactly how to do it right.
Why Convert Granular Fertilizer to Liquid?
Before we dive into the how-to, let’s talk about why you’d want to make liquid fertilizer from granular in the first place.
Faster Nutrient Uptake
Liquid fertilizers are absorbed by plants way faster than granular ones.
Think about it:
When you apply granular fertilizer, it needs to break down in the soil first. Then it needs moisture to dissolve. Only then can plants absorb the nutrients.
But with liquid fertilizer? The nutrients are already dissolved and ready to go.
Better for Container Plants
Container plants LOVE liquid fertilizer.
Why?
Because the nutrients get distributed evenly throughout the pot. No hot spots. No nutrient pockets. Just consistent feeding throughout the root zone.
Works in Cold Weather
Here’s something most people don’t know:
Granular fertilizers barely work when soil temperatures drop below 50°F. The microbial activity that breaks down the fertilizer basically stops.
But liquid fertilizer? It works immediately, regardless of temperature.
Cost Savings
A bag of granular fertilizer costs way less than pre-made liquid fertilizer. By making your own liquid solution, you get the benefits of liquid fertilizer at granular prices.
Which Granular Fertilizers Work Best?
Not all granular fertilizers dissolve well in water.
Here’s what works:
Water-Soluble Fertilizers
Look for bags that specifically say “water-soluble” on the label. These dissolve completely with minimal residue.
Examples include:
- Miracle-Gro Water Soluble All Purpose Plant Food
- Jack’s Classic fertilizers
- Most synthetic fertilizers (like 20-20-20 or 10-10-10)
What to Avoid
Stay away from these types:
- Slow-release fertilizers (they have coatings that won’t dissolve)
- Organic fertilizers with large chunks (like bone meal)
- Time-release pellets
- Fertilizers with polymer coatings
How to Mix Granular Fertilizer Into Liquid: Step-by-Step Instructions
Let’s get into the actual process.
What You’ll Need
- Water-soluble granular fertilizer
- Large bucket or container
- Warm water (not hot)
- Stirring stick or drill with mixing attachment
- Fine mesh strainer or cheesecloth
- Storage container
The Basic Recipe
The standard mixing ratio is 1 cup of granular fertilizer per 1 gallon of water.
But here’s the thing:
This ratio works for most general-purpose fertilizers. For high-nitrogen fertilizers, start with 3/4 cup per gallon to avoid burning your plants.
Step 1: Add Fertilizer to Container
Pour your measured fertilizer into the bucket first. Don’t add water yet.
Step 2: Add Warm Water
Now add warm water (around 80-90°F). Warm water helps the fertilizer dissolve faster than cold water.
Pro tip: Add the water slowly while stirring to prevent clumping.
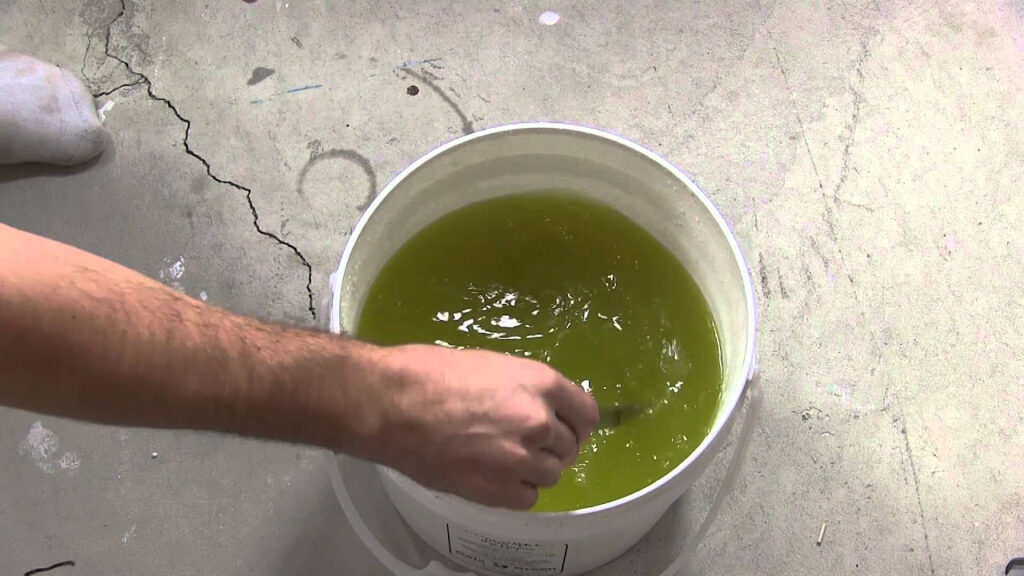
Step 3: Mix Thoroughly
Stir the mixture well. Really get in there. I use a paint mixing attachment on my drill for larger batches.
Step 4: Let It Soak
This is the most important step that people skip:
Let the mixture sit for 24 hours.
Stir it occasionally during this time. This extended soak ensures all the nutrients dissolve properly.
Step 5: Strain the Solution
Even with water-soluble fertilizers, you’ll likely have some sediment.
Use a fine mesh strainer or cheesecloth to filter out any particles. This is crucial if you plan to use the liquid in a sprayer.
The leftover solids? Don’t toss them. They still have nutrients and work great as a light top dressing for garden beds.
Application Methods
Now that you’ve got your liquid fertilizer, here’s how to use it.
Foliar Feeding
Spray the diluted solution directly on leaves for the fastest absorption.
Important:
- Dilute to 50% strength for foliar application
- Apply early morning or evening to prevent leaf burn
- Avoid spraying in direct sunlight
Soil Drench
Pour the liquid around the base of plants, ensuring it reaches the root zone.
This method works great for:
- Vegetable gardens
- Container plants
- Newly transplanted seedlings
Through Irrigation Systems
Add the liquid fertilizer to your watering can or irrigation system for easy application.
Just be sure to:
- Clean your equipment after use
- Use well-strained solution to prevent clogs
- Adjust concentration based on frequency of watering
Concentration Guidelines
Getting the concentration right is critical.
Here’s my tested approach:
For Different Plant Types
Seedlings and young plants: Use 1/2 the standard concentration
Established vegetables: Use full strength (1 cup per gallon recipe)
Flowering plants: Start with 3/4 strength and adjust based on response
Trees and shrubs: Use 2-3 gallons of full-strength solution per plant
Testing Your Mix
Before applying to your entire garden:
- Test on a small area first
- Wait 24-48 hours
- Check for any signs of fertilizer burn
- Adjust concentration if needed
Safety Considerations
Let’s talk safety for a minute.
Personal Protection
Always wear:
- Gloves when handling concentrated solutions
- Eye protection when mixing
- Long sleeves to prevent skin contact
Storage Tips
Store your liquid fertilizer in:
- Labeled containers (super important!)
- Cool, dark places
- Child-proof areas
- Sealed containers to prevent evaporation
Environmental Concerns
Never:
- Pour excess solution down storm drains
- Apply before heavy rain
- Over-fertilize near water sources
Troubleshooting Common Issues
Sometimes things don’t go as planned. Here’s how to fix common problems.
Fertilizer Won’t Dissolve Completely
This usually means:
- You’re using the wrong type of fertilizer
- Water is too cold
- Not enough soaking time
Solution: Use warmer water and let it soak longer. If it still won’t dissolve after 48 hours, you probably have a slow-release formula.
Plants Show Burn Symptoms
If you see brown leaf edges or wilting:
- Dilute your solution more
- Flush soil with plain water
- Reduce application frequency
Clogged Sprayer
To prevent clogs:
- Always strain thoroughly
- Use finer mesh filters
- Clean equipment immediately after use
Advanced Mixing Techniques
Want to level up your liquid fertilizer game? Try these pro techniques.
Using Organic Granular Fertilizers
While trickier, you can make liquid solutions from organic fertilizers:
- Use hot (not boiling) water
- Soak for 48-72 hours
- Strain multiple times
- Expect more sediment
Creating Custom Blends
Mix different fertilizers for specific needs:
- High nitrogen for leafy growth
- Balanced for general feeding
- High phosphorus for blooming
Just calculate each component separately, then combine.
Adding Supplements
Enhance your liquid fertilizer with:
- Kelp extract for growth hormones
- Epsom salt for magnesium
- Calcium solutions for tomatoes
Money-Saving Tips
Let’s talk about maximizing your fertilizer budget.
Bulk Buying
Buy granular fertilizer in 50-pound bags for the best price per pound. Store properly and it’ll last years.
Batch Preparation
Make larger batches and store them. A 5-gallon batch usually lasts me 2-3 weeks.
Dilution Strategies
Remember: You can always dilute more, but you can’t make it stronger once mixed. Start with less fertilizer if you’re unsure.
The Bottom Line
Converting granular fertilizer to liquid gives you flexibility, faster results, and significant cost savings.
The key points to remember:
- Use water-soluble fertilizers only
- Follow the 1 cup per gallon ratio (adjust for high-nitrogen types)
- Always soak for 24 hours
- Strain before use
- Test on a small area first
Once you master how to mix granular fertilizer into liquid, you’ll wonder why you didn’t start sooner. Your plants will thank you with faster growth, better yields, and healthier appearance.